How to Sharpen a Hunting Knife: A Simple Step-by-Step Guide
A dull hunting knife makes clean cuts harder and may increase the chance of injury. Sharpening takes a bit of care, but most hunters can manage it with basic tools and steady hands. There’s no one right way for every person or blade, though certain steps are widely used because they tend to work well.
Picking a Sharpening Tool
Different tools suit different needs. Whetstones offer control and precision. Pull-through sharpeners work faster, but they might remove more material than needed.
Diamond rods and ceramic sticks, while often seen as maintenance tools, can help keep an edge between full sharpenings. For most hunters, using a sharpening stone is likely to provide the best balance between effectiveness and care for the blade.
Understanding the Edge
Knife edges are shaped at specific angles. A hunting knife is often sharpened between 20 to 25 degrees per side. This range balances sharpness with durability. Sharpening at too low an angle may produce a thinner edge, but it could also make the knife more prone to chipping.
A slightly wider angle might offer a tougher edge that lasts longer in the field. It’s helpful to stay consistent with the angle through the sharpening process.
Step-by-Step: Using a Sharpening Stone
Sharpening with a stone is a hands-on process. It may take a few tries to get the motion right, but the results are usually worth the effort.
- Secure the stone. Set it on a flat, stable surface. A damp cloth or non-slip pad under the stone can prevent movement.
- Apply water or oil. Many stones require a lubricant. Always check the stone’s instructions.
- Hold the blade at the correct angle. Position the knife so the edge meets the stone at the right angle—often about the height of two stacked coins.
- Draw the blade across the stone. Use smooth, even strokes. Start at the heel of the blade and finish at the tip. Think of slicing a thin layer off the stone.
- Repeat on both sides. After a few strokes, switch sides. Try to keep your count and angle the same for each side.
- Feel for a burr. Gently check the edge. A small burr means the metal has rolled and the edge is forming.
- Remove the burr. Switch to a finer grit or use lighter strokes to clean up the edge.
- Test the sharpness. The blade should cut through paper without tearing or hesitation. Some also test by gently shaving a small patch of arm hair or slicing across a tomato.
Between Sharpenings
Keeping an edge doesn’t always require full sharpening. Light honing with a ceramic rod or fine stone can help maintain sharpness. Wiping the blade clean after use also prevents buildup that might dull the edge over time.
It’s worth noting that not every job requires a razor-sharp edge. For splitting bone or scraping hides, a slightly duller edge might actually hold up better. Use the edge that suits the task.
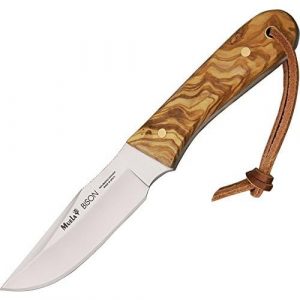
MUELA BISON-9OL Olive Wood Handle Hunting Knife
How to Know When It’s Time
A few signs might suggest that a hunting knife needs sharpening:
- It no longer cuts cleanly.
- You feel resistance while slicing.
- The blade slides or skips across the surface rather than biting in.
Some hunters prefer to sharpen their knives before each outing. Others wait until they notice a drop in performance. Either approach can work if the knife stays functional and safe.
Final Thoughts
Sharpening a hunting knife is a practical skill. It may take some trial and error, but most users can get good results with basic gear and attention to detail. Over time, muscle memory often develops. When it does, the task becomes quicker and more natural.
In the field or at home, a well-sharpened knife makes all the difference.